In first you might think that spiders was already weird enough for the asians, but guess what they also make ricecakes! Its pretty good though! Well for me atleast, so today I will be teaching you how to make it.
You can use a microwave or a steamer to make garaetteok, whichever one you have at home and feel comfortable with. The dough ratio is a little different depending on which method you use, so be sure to use the right one.
After it’s made, you can cut and prepare it for tteokbokki or tteokguk. Both methods are described below.
Ingredients
2 cups of short grain rice flour
½ ts salt
¾ cup of boiling water if using a microwave, 1 cup of boiling water if using a steamer (you may need more or less depending on how much moisture is in your short grain rice flour, see the note above)
1 ts sesami oil
ADVERTISEMENT
Directions
If you bought frozen rice flour from a Korean grocery store, put it in the fridge overnight until it thaws out and the flour becomes a powder. If you made your own rice flour, you don’t need to do this
Making rice cake with a microwave:
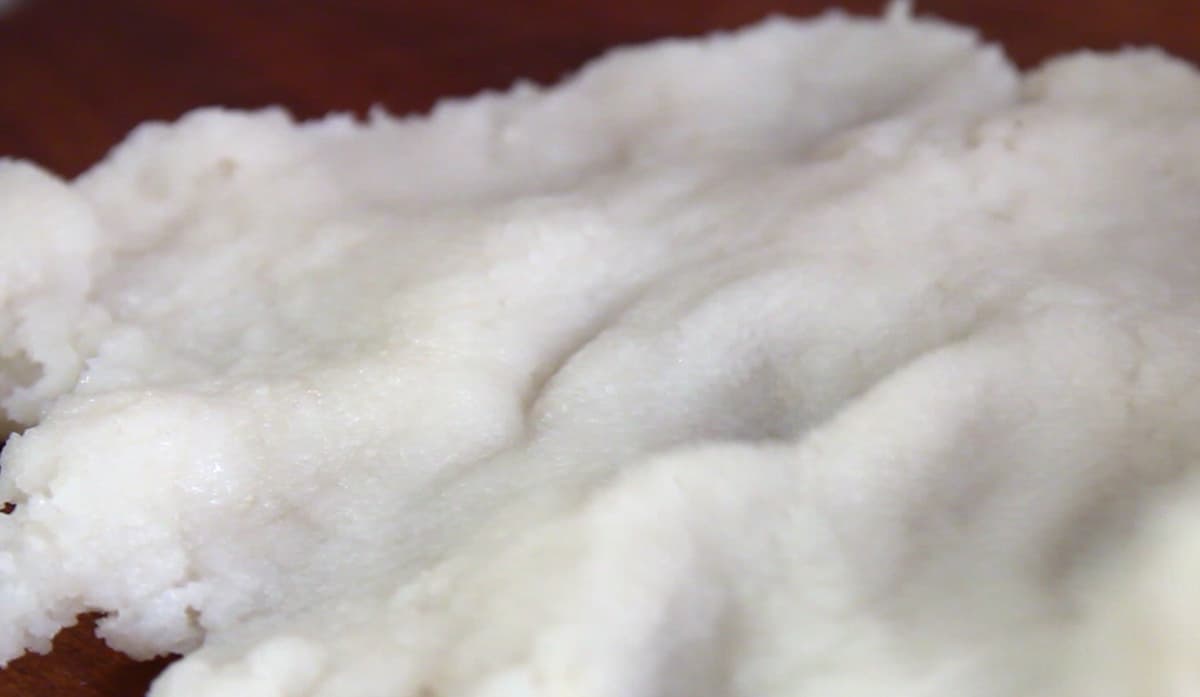
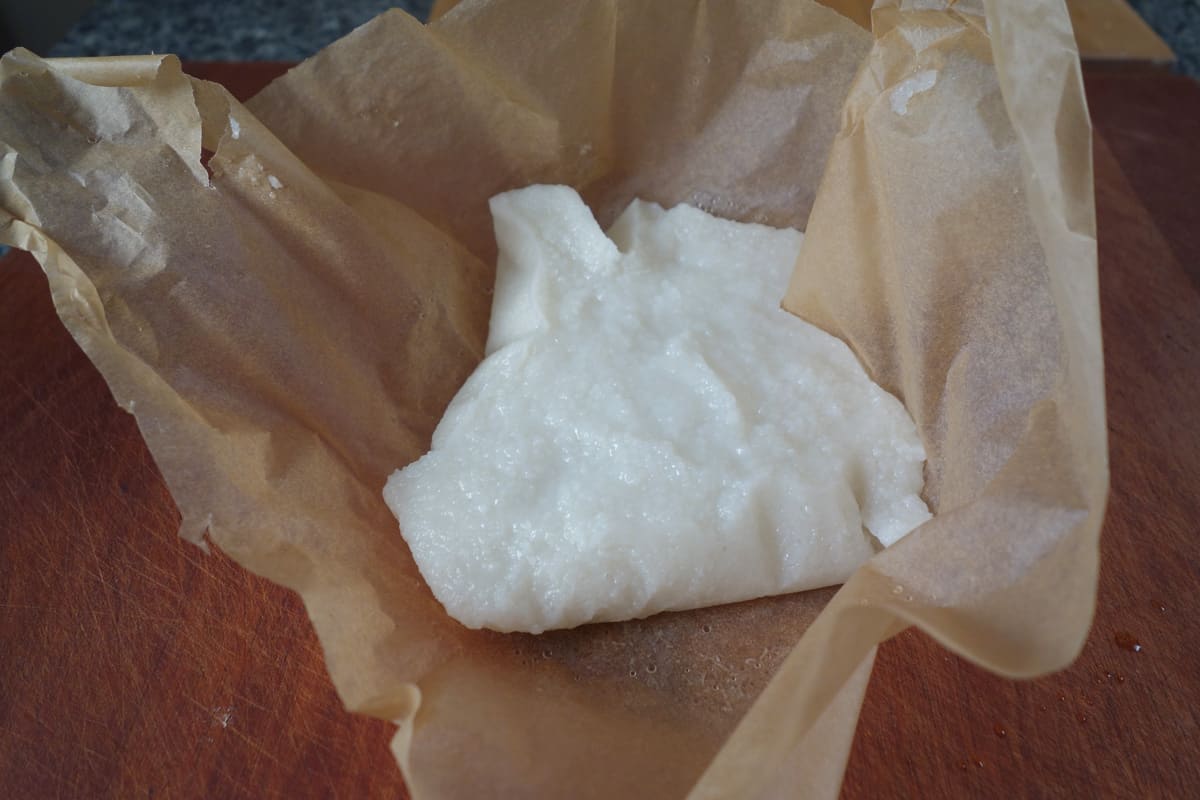
Combine the rice flour, salt, and boiling water in a bowl. It should have the consistency of the mixture in this photo:
Cover it with plastic wrap, leaving a small gap to let the steam release. Microwave for 2 minutes.
Mix the rice cake dough with a rice scoop or wooden spoon.
Re-cover with the plastic wrap and cook for another 2 minutes.
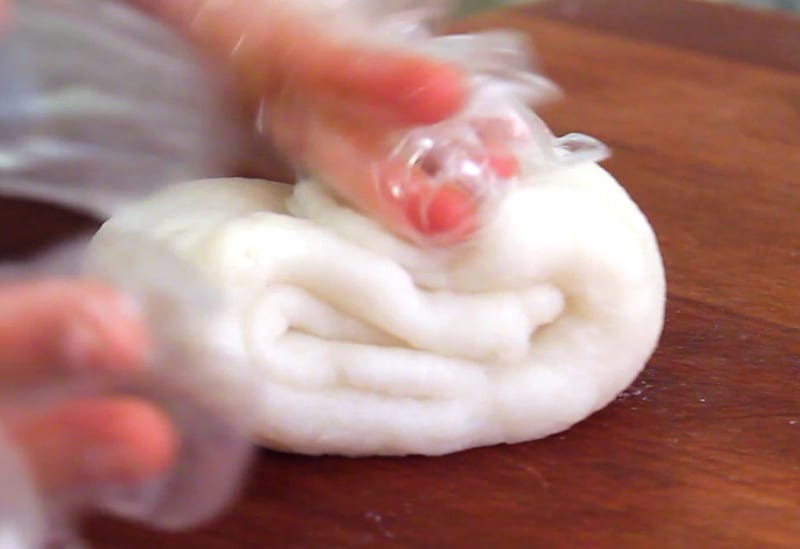
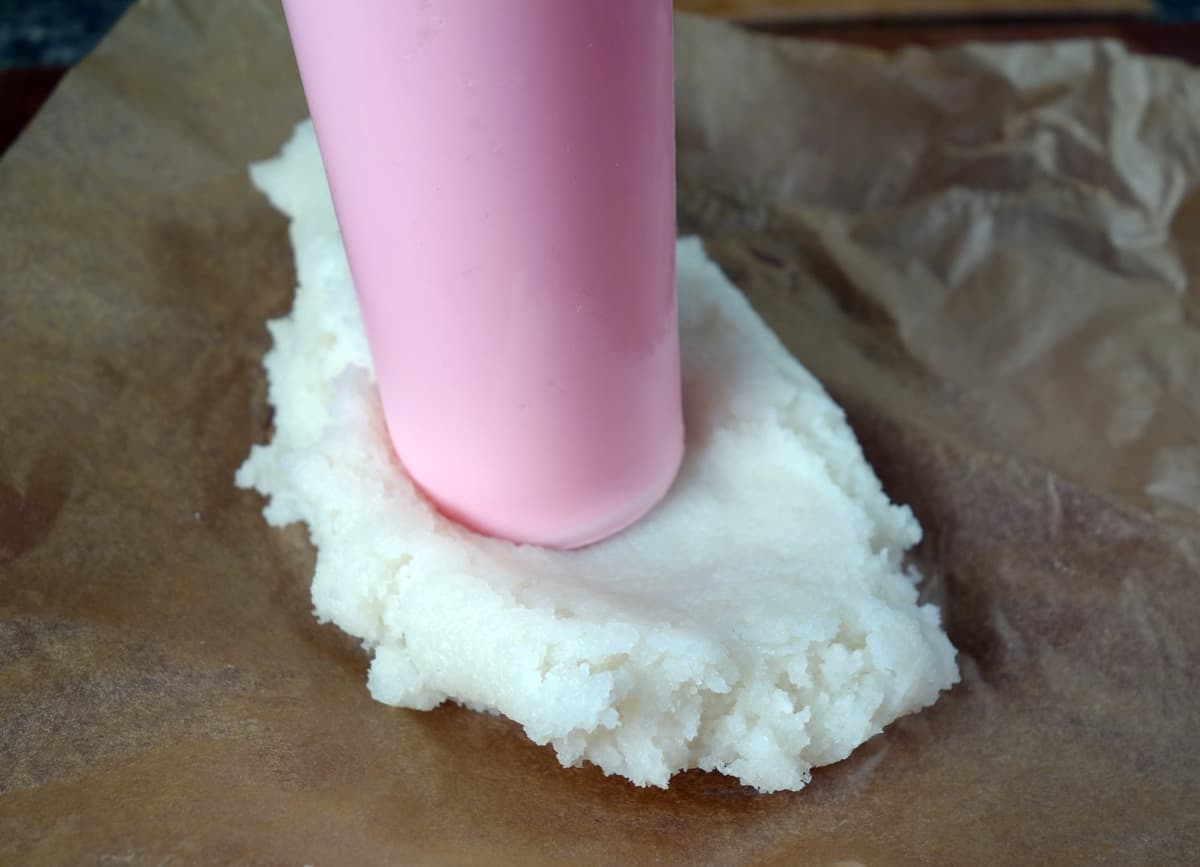
Spread ½ ts sesame oil on your cutting board. Put the hot rice cake in the oily spot on the cutting board. Pound it with a pestle for about 5 minutes, until it becomes smooth and elastic.
Making rice cake with a steamer:
Combine the rice flour, salt, and boiling water in a bowl.
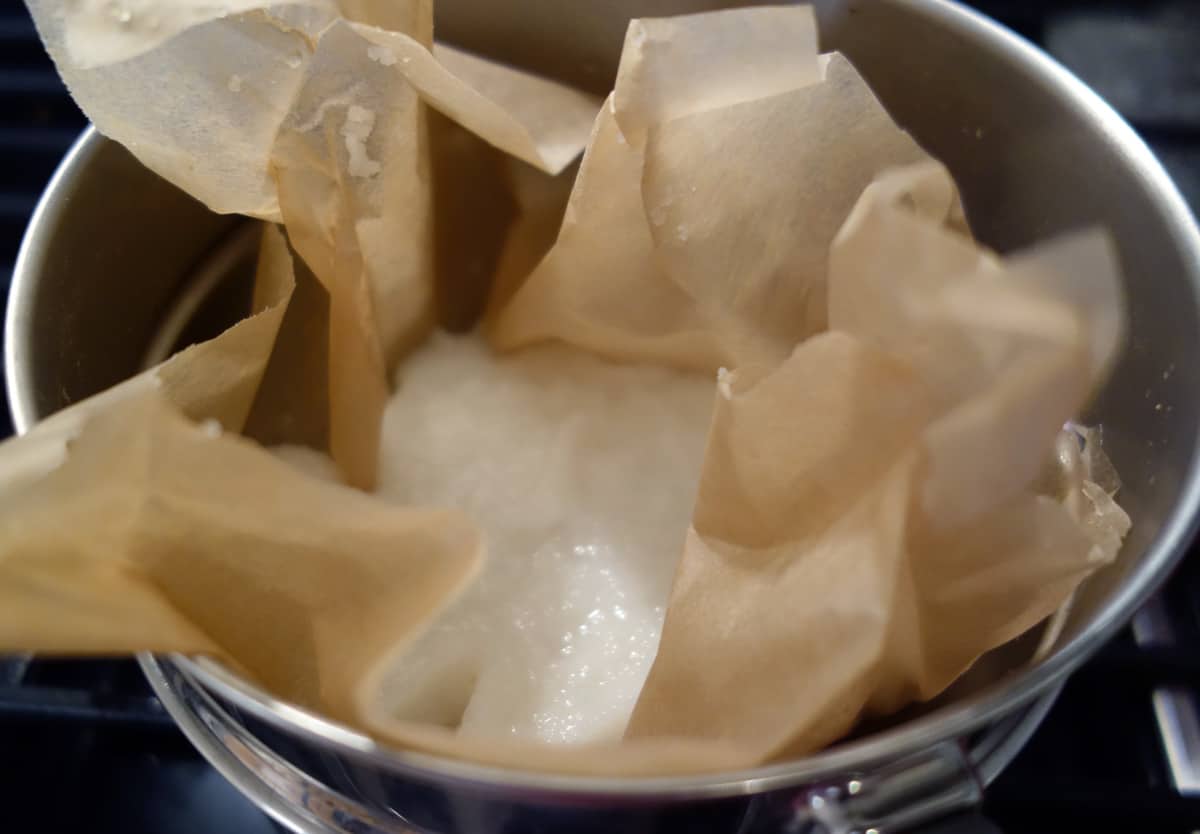
Line a steamer rack with parchment paper. Add the rice cake dough and steam for about 25 minutes over hight heat.
Spread ½ ts sesame oil on your cutting board. Put the hot rice cake in the oily spot on the cutting board. Pound it with a pestle for about 5 minutes, until it becomes smooth and elastic. The rest of process is the same as the method of using a microwave oven.
Prepare the rice cake for ddeokbokki:
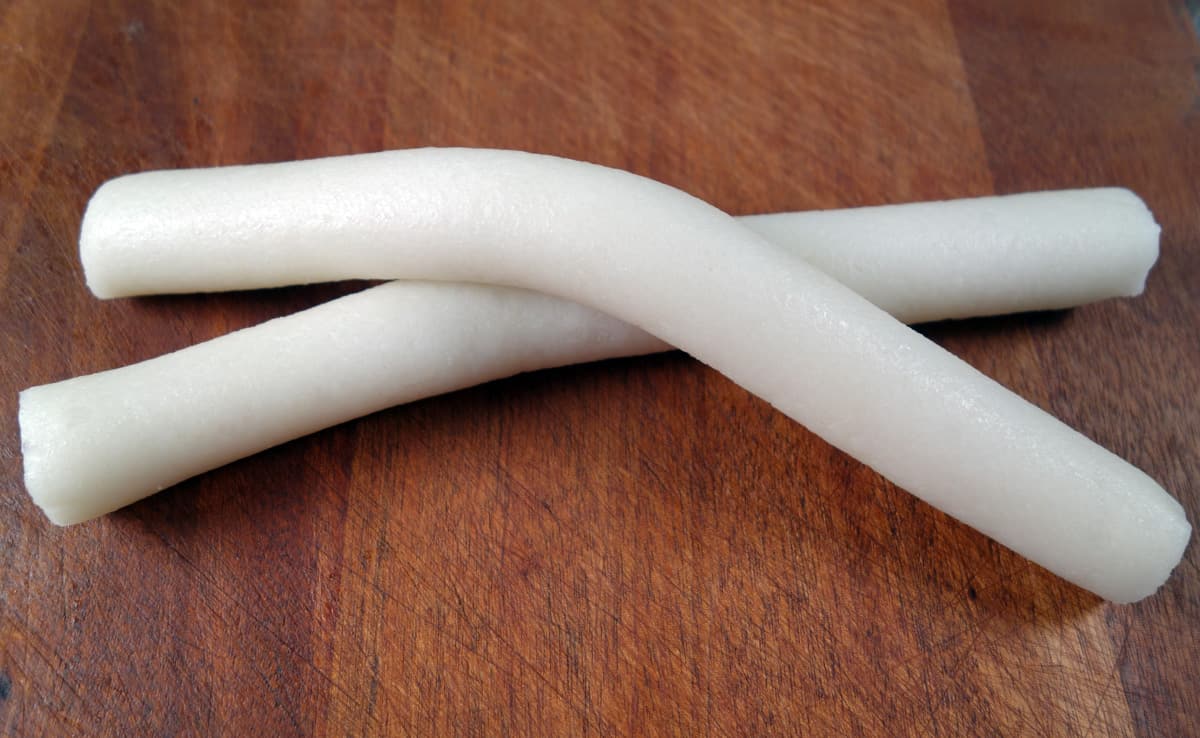
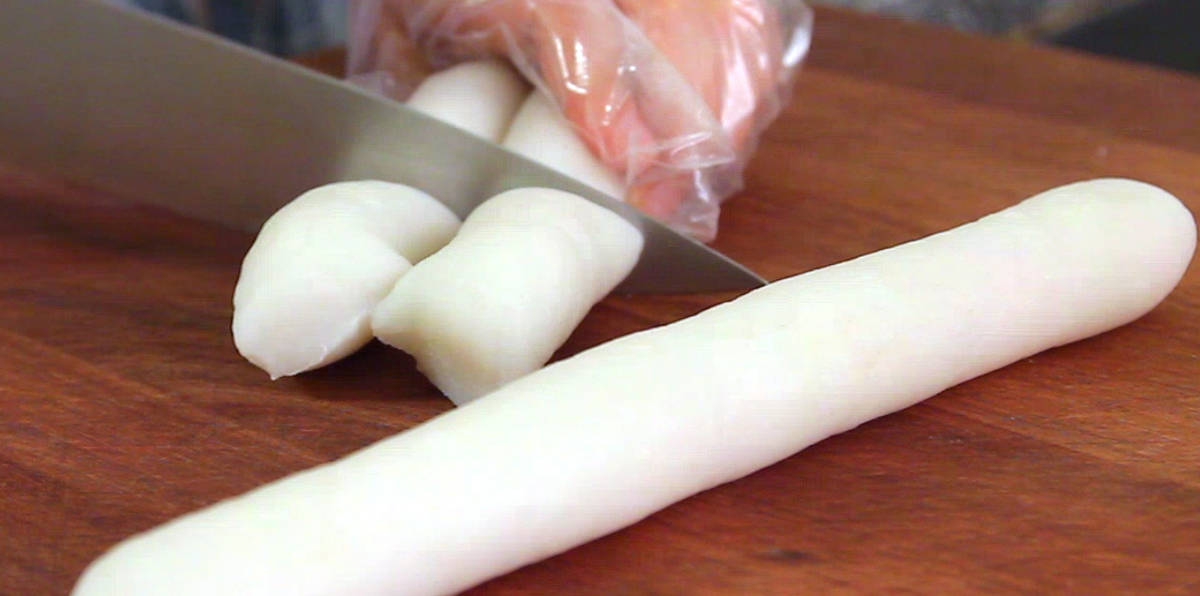
Cut it into 8 equal pieces, then roll each piece out into a 4 inch long cylinder shaped rice cake.
Put ½ ts sesame oil onto your hands and gently rub the rice cakes to coat them in a thin sheen of oil. This will give them a nice flavor and keep them from sticking to each other.
Prepare the rice cake for ddeokguk (rice cake soup):
Cut it into 2 equal pieces, then roll each piece out into two 10 inch long cylinder shaped rice cakes.
Let them cool at room temperature for several hours, then slice diagonally into thin discs.
Use right away, or put in a plastic bag and freeze for later use. This amount is for 1 serving of ddeokguk, so if you want to make two bowls of soup, make two batches.
When we hear the word asia the first comes up is japan, korea, and china. Though the biggest country in existance right now in asia is Russia. This country has a very diverse cusine , it’s made up Northern and Eastern Europe cusine, central asia, and east asia. There is a dish that is asia from the outside, but european in the inside, the dish is called Pelmeni. I have personally tasted this in america and I can say for sure that it taste very good, so today I will teach you how to make it.
Ingredients for Russian Pelmeni Dough:
2/3 cups buttermilk 1 Tbsp sour cream 2 large eggs 2 cups warm water 1 1/2 tsp salt 7 cups plus 6 Tbsp unbleached all-purpose flour
1. Using the whisk attachment on medium speed, mix together: 2/3 cup buttermilk, 1 Tbsp of sour cream 2 cups warm water, 2 eggs and 1 1/2 tsp salt until well blended (please excuse the fact that this picture has the paddle attachment – I hauled my mixer to my sister’s house to make these and forgot the whisk!).
2. Switch to dough hook and add 4 cups flour. Mix on speed 2 until well blended.
3. Add 3 more cups of flour (one cup at a time and wait for the dough to become well blended with each cup). Add the rest of the flour 1 Tbsp at a time, until the dough is no longer sticking to the sides of the bowl (I used 6 Tbsp). Once it is no longer sticking to the bowl, continue to mix 5 minutes. (Total mixing time is about 20 minutes from the time you start adding flour).
4. Place the dough on a lightly floured surface.
How to Make Pelmeni Filling:
1. Heat 1 Tbsp oil in a medium skillet. Add onion and saute until golden and soft. Add garlic and saute another minute.
2. Mix together pork, turkey, onion & garlic mix, 3/4 tsp salt, 1/2 tsp ground pepper and 1 tsp hot sauce (optional).
If using a pelmeni mold:
1. Cut off about tennis-ball-size chunks of dough and roll out into a circle.
2. Place over mold. Place 1/2 tsp meat into each pocket space on the mold.
3. Roll out another chunk of dough and place over the mold.
4. Use a rolling pin, roll the top, working from the center – outwards until the pelmeni are well-defined.
5. Turn the pelmeni maker over and push the pelmeni out onto a well-floured cutting board.
6. Arrange pelmeni evenly on the cutting board, sprinkle with flour and place in the freezer. Pinch together any open edges on pelmeni or the meat will float out during cooking.
7. Once they are fully frozen, put them in large ziploc bags, sprinkle with flour and freeze them for future enjoyment.
If making pelmeni by hand:
1. Shape a portion of the dough into a 1 to 2 -inch thick log. Cut off 1 piece at a time (about gum ball sized) and roll into disks to form a 1.5-inch circle with rolling pin. Sprinkle rolling pin and surface with flour if needed.
2. Place 1 tsp pelmeni filling in the center,
3. lose the edges and pinch together.
4. Pinch the corners to gether to form, well… a diaper shape.
5. Place pelmeni onto a well-floured cutting board. Arrange pelmeni evenly on the cutting board, sprinkle with flour and place in the freezer.
6. Once they are fully frozen, put them in large ziploc bags, sprinkle with flour and freeze them for future enjoyment.
To Cook Pelmeni:
Bring a pot of water to boil (add 1 Tbsp salt for a large soup pot, or 1 tsp salt for a smaller 4 quart pot). Add FROZEN pelmeni and return to a boil. They should float to the top, then boil for 3 minutes longer (or until meat is fully cooked). Drain pelmeni and place them in a clean bowl. Toss pelmeni with butter and sprinkle with dill (optional). Serve them warm with ketchup, sour cream or vinegar (my personal favorite).
When you are making dough the first comes up to mind might be pizza or maybe pastry thats is sweet right? Well I guess its common knowledge that noddles are made from dough aswell. Some might not know this so if you don’t, well congratulations you now do know it. The idea first start at a contry that is well know for its “made in” tag. Yes, you guess right its China, but people might confuse that the idea started from japan or maybe even korea, but no, even if they do have a lit of similarities when it comes with dishes that they make with the noddles. It still originated from china. If you have been reading my articles consistetly, then you would’ve realized that I do add these kind of facts through out my articles. Today we will be talking about the types of noddles.
Beware that I am only naming a few.
1.Udon
Udon are the thickest of the noodles and are made by kneading wheat flour, salt, and water together. Udon can be eaten hot or cold and are cooked in a variety of ways. (I recommend hot)
2.Soba
Soba is the Japanese name for buckwheat. It usually refers to thin noodles made from buckwheat flour, or a combination of buckwheat and wheat flours.
3. Cellpphane noddles
Cellophane noodles, also known as glass noodles, are a type of transparent noodle made from starch and water. (Usually sold dried)
4.Lo mein
Lo mein is a Chinese dish with egg noodles. It often contains vegetables and some type of meat or seafood, usually beef, chicken, pork, shrimp or wontons. It can also be eaten with just vegetables. Traditionally this is a dry variation of wonton noodle soup.
These are the kinds of noddles that 8 have tried in my lifetime.
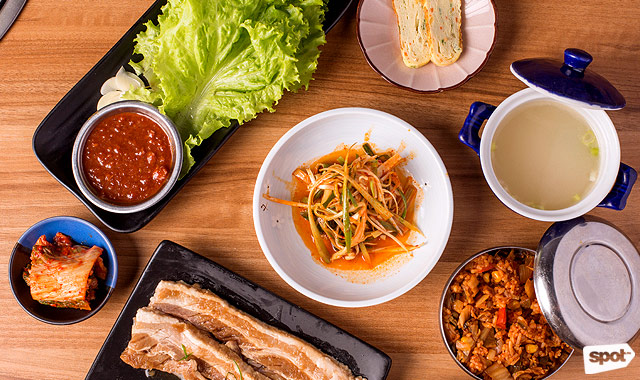
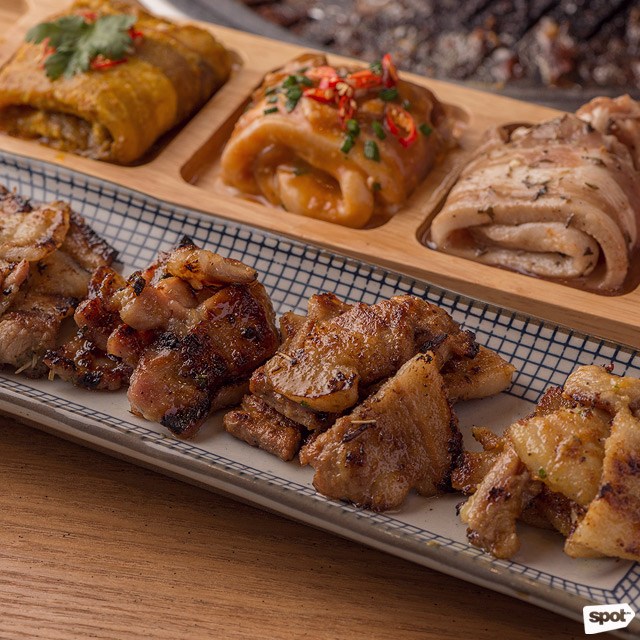
If we hear about meat we usually hear about steakyamerican style kind of meat, what we don’t regard is korean bbq. Today we will be talking about how to make the best of eating your meat(korean ver. Ofc) lets start with the fact that the most common place for us to dind korean meat is , you guessed it , a korean bbq unlimited (meat w/side dish) kind of restaurant. Let me teach you a way to make the most of your meal.
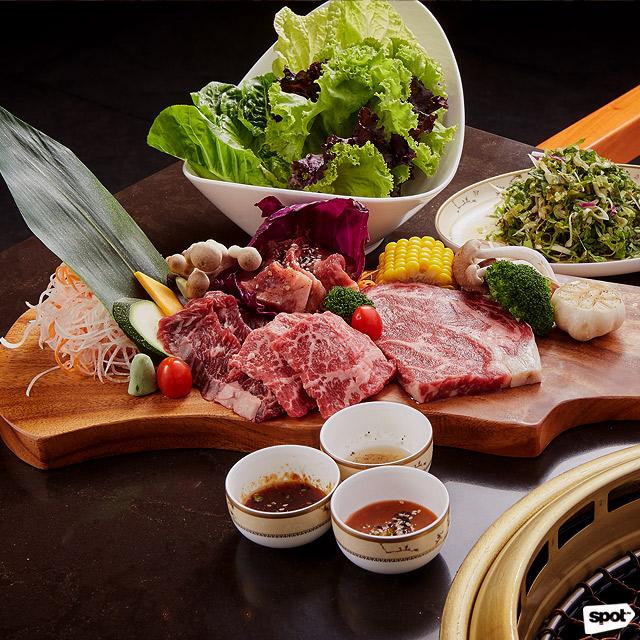
The whole experience korean bbq restaurant has its own charm. You pick your own marinated or non-marinated slices of beef, pork, or chicken. While you’re waiting for the built-in grills to heat up, you can sneak in a bite or two from the small bowls of side dishes, also known as banchan. Once the meat is cooked, you wrap a piece of lettuce around the grilled meat and a few banchan. With practice, you’ll eventually master the art of “grill, wrap, and repeat!”
The moment you’re introduced to the taste of a perfectly grilled, thinly-sliced beef that’s wrapped beautifully in a piece of lettuce, then you’ll understand why people love and crave it. The long lines you would usually see in Korean barbecue restaurants start to make sense. How can one resist a bang-for-your-buck offer to eat unlimited grilled, delicious meat? It’s perfect for a lunch out with family or even to cap off a night out with friends!
Whether it’s your first intro to a K-BBQ feast or your hundredth meal, these are some helpful and delicious tips to take note of:
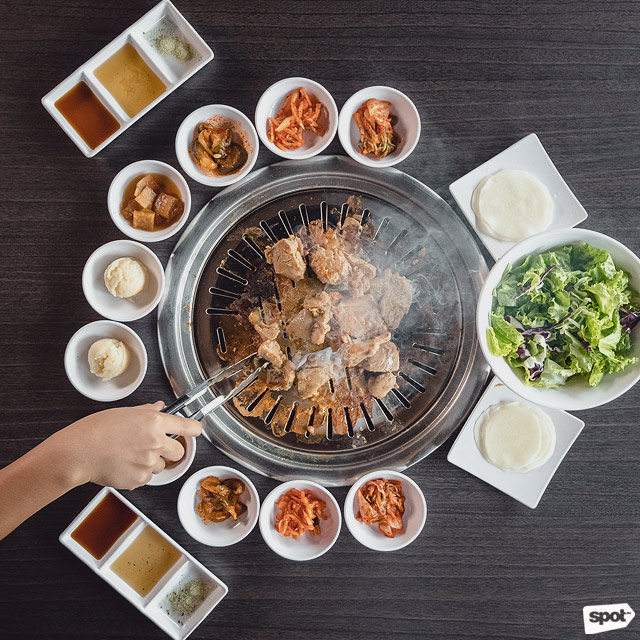
Refill your banchan
PHOTO BY JILSON TIU
Before your choice of meat arrives at your table, you will be welcomed by numerous bowls of banchan. These side dishes are important to your K-BBQ experience for they add varying flavors and texture to each bite. If you need a second (or even more) serving of kimchi (fermented vegetables and spices), kkadugi (cubed radish kimchi), sukjunamul(marinated mung bean sprouts), gamja jorim(glazed potatoes), japchae (stir-fried glass noodles), or whatever side dish is available, all you have to do is ask the server.
Grill your kimchi
PHOTO BY HANS FAUSTO
Although we’re used to eating kimchi as is, grilling this side dish adds a smokiness to it. It would be best to indirectly heat it by grilling it on the sides where the temperature is not too high. These spicy, fermented vegetables will become warmer, softer, and will further compliment your choice of meat.
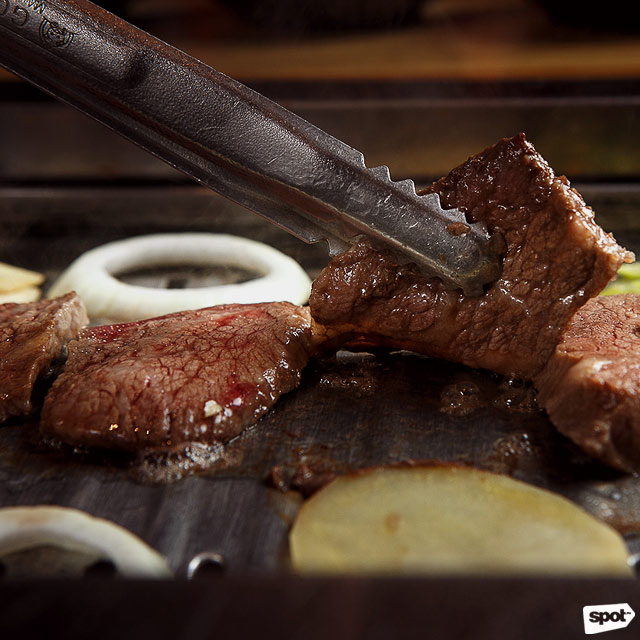
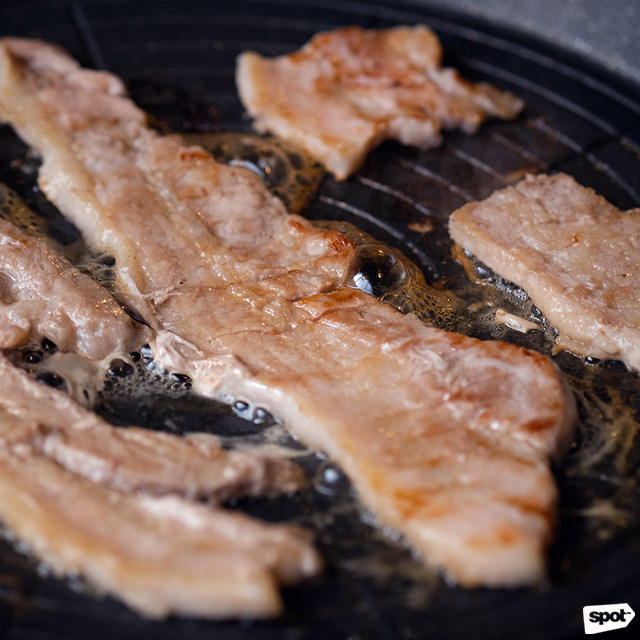
Cook your meat well
PHOTO BY IAN SANTOS
Although we can eat steak that is on the pinkish side, the meats provided in Korean barbecues are advised to be cooked properly. How can you avoid undercooking and overcooking it? You can tell that the meat is ready to be flipped when you see little beads of sweat on top.
PHOTO BY HANS FAUSTO
When you cook meat that’s marinated with sauce, such as gochujang (red chili paste), some of its flavors will often stick to the grill. You must avoid doing this if you don’t want to cook your non-marinated meat with the residual bits of the marinated meat!
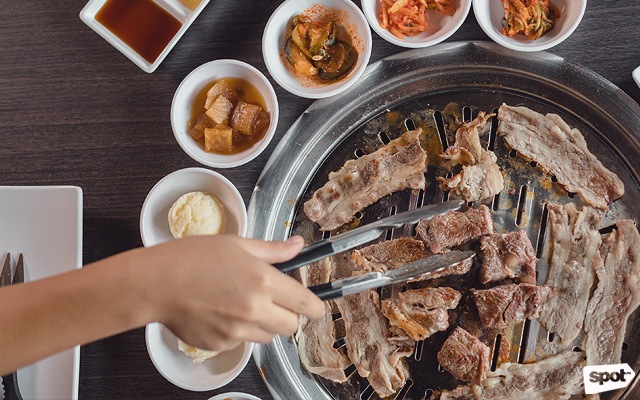
Change grills
PHOTO BY MAJOY SIASON
In case you want to cook non-marinated meat after grilling marinated meat, you can ask the server to change your grill so the flavors don’t transfer to the non-marinated meat. You can also ask them to change the grill if there are too many charred bits and pieces stuck to the grill.
Don’t overpack the grill
PHOTO BY JILSON TIU
In most cases, the built-in grills in Korean barbecue restaurants are quite small. There’s only enough room for a few pieces. Avoid overpacking the grill and overlapping your choice of meat so it cooks evenly.
Don’t overfill your lettuce
PHOTO BY DAIRY DARILAG
Once you’ve wrapped your cooked meat and choice of banchan in a piece of lettuce, you can opt to dip it in Korean sauces such as the spicy ssamjang (sauce made with doenjang, gochujang, sesame oil, onion, garlic, green onions, and brown sugar). It’s best to not let your lettuce overflow with meat and banchan because these lettuce wraps are typically consumed in one bite only.
As you can see in the title of this article, thats its a anime themed article, since I first saw ramen in my favorite anime Naruto. Growing up I would always imagine me eating one of these delicious looking food, yet I was just a young child inferior to who I am now. I wanted to share this simple things to make your normal noddles to a better one, but before that lets talk about ramen. The word itself is nihonggo or Japanese which means “to pull noddles” yet the noddle idea was originated in china, if u look up ramen in google you might see its definitions as a quick cooked noddle served with broth and meat. I disagree with this definition knowing that there is more than a instant definating noddle in what the internet said. Its a japanese cultured food that holds many meaning in my opinion, but thats just mine right? Lets start on how to make ur ramen just a bit better than normal.
Place eggs in a large saucepan and cover with cold water by 1 inch. Bring to a boil and cook for 1 minute. Cover eggs with a tight-fitting lid and remove from heat; set aside for 8-10 minutes. Drain well and let cool before peeling and halving.
Heat olive oil in a large stockpot or Dutch oven over medium heat. Add garlic and ginger, and cook, stirring frequently, until fragrant, about 1-2 minutes.
Whisk in chicken broth, mushrooms, soy sauce and 3 cups water.
Bring to a boil; reduce heat and simmer until mushrooms have softened, about 10 minutes. Stir in Yaki-Soba until loosened and cooked through, about 2-3 minutes.
Stir in spinach, Narutomaki, carrot and chives until the spinach begins to wilt, about 2 minutes.
Have you ever watched anime? Well I HAVE! And you should too you uncultured swine(joke). The last post I made I said we are going to talk about east asian food and one the country that is very well know is japan. As a weebo I love watching anime and reading manga as a hobby and guess where it was originated, thats right china HAHAHAH no its japan, if actually believed what I said for a second then we can’t be friends (literally), but thats okay because probably only my teacher will see this and maybe a stalker? I dunno bro. As a person that wants to talk about east asian cusine like specifically japanese food, we need to find some commom ground as viewers and content creators well the most common food is sushi! And how do you make it you ask, this is a full tutorial that I don’t own and just honestly copy and pasted in this article, because I personally accepted the fact if I tried to make this today I would screw it all up.
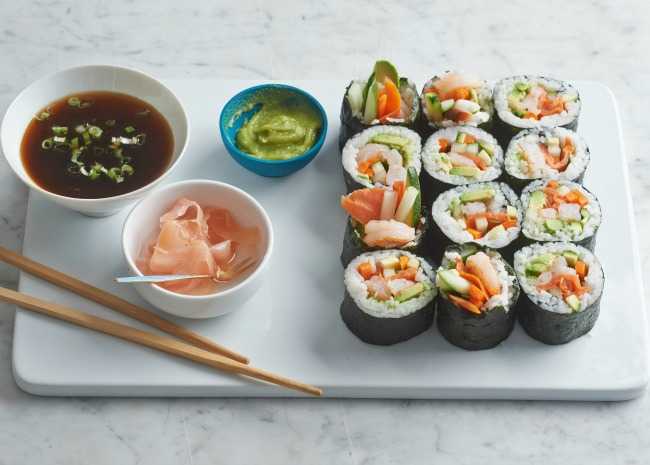
Make your own sushi! Making sushi at home is surprisingly simple. We’ll start with how to make sushi for beginners, which means sushi rolls. With just a little practice, you can make sushi rolls at home that are as dazzling to look at as they are delicious to eat.
California Roll | Photo by Meredith
How to Make Sushi Rolls
Today, we’re making a variation on the California roll. Along with sushi rice and sheets of seaweed (nori), California rolls require only a few ingredients: crab meat (or imitation), avocado, and cucumber. If you like, mix the crab meat with a little mayo to create a creamy consistency. To this basic list of ingredients, we’ve added sliced carrots and cooked shrimp…because that’s how we (sushi) roll.p>Before we got further, a quick note on sushi rice. You can’t use just any rice for sushi. Sushi rice is a special preparation of rice flavored with rice vinegar, sugar, and salt. It’s made from short-grain rice (Japonica), typically made in Japan and parts of California and Italy. With homemade sushi rice, you’re aiming for rice that’s fluffy and a little sticky but not too sticky. Give it a try — you’ll get the hang of it. See how to make sushi rice.
Your Sushi Making Kit
To make sushi at home, you’ll need a few essential tools for making sushi:
Bamboo rolling mat (makisu)
Plastic wrap
Sharp knife
How to Make California Roll Sushi
This is the traditional way to roll any type of rolled sushi, which is called maki sushi. There are actually two options for this method: rolling with the sushi rice on top of the sheet of nori, as we do here; or with the nori flipped over so the rice ends up on the outside of the finished roll (uramaki sushi).
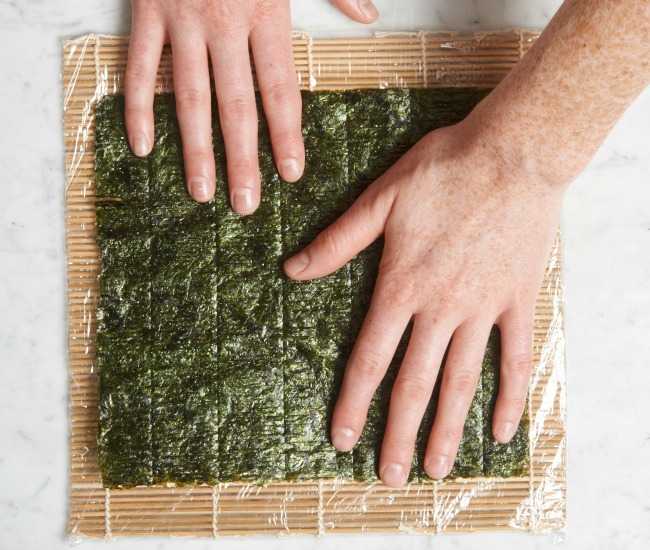
1. Place the bamboo rolling mat on a cutting board so the bamboo strips are running horizontally to you. Spread a strip of plastic wrap over the bamboo mat. Then place a sheet (or a half sheet) of nori on the plastic wrap.
Laying nori on plastic wrap on bamboo mat | Photo by Meredith
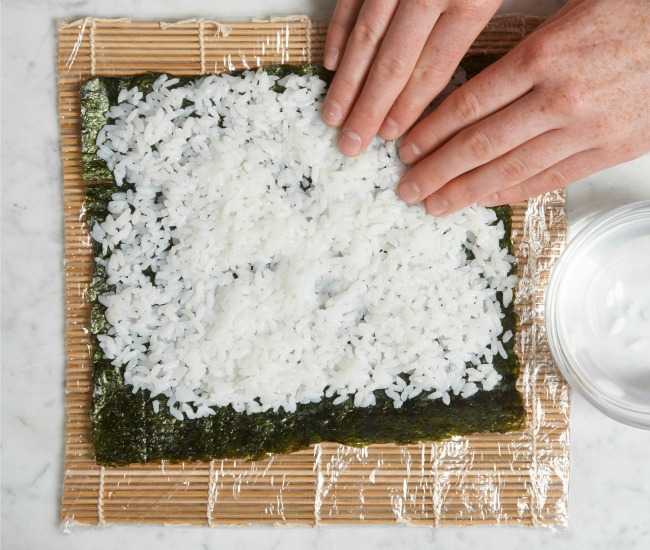
2. Spread a thin layer of sushi rice over the nori. (See below for more about making perfect sushi rice.)
Don’t use too much rice. With a little practice, you’ll get a feel for how much rice to use. We’re spreading about 1 cup of rice per whole sheet of nori, leaving a small space at the top edge of the nori so you can seal up the roll.
PRO TIP: wet your fingers as you spread the sticky sushi rice over the nori.
Spreading sushi rice onto nori | Photo by Meredith
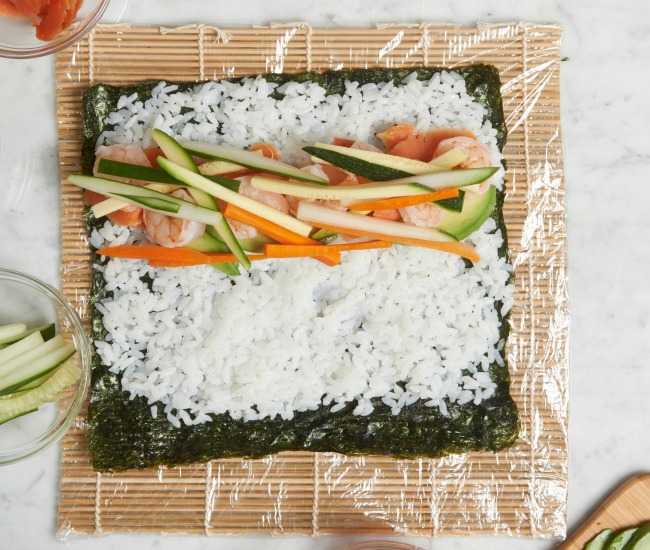
3. Add your ingredients toward the center of the rice-covered nori. Don’t overpack it. If you’re making a roll with the rice on the outside, simply turn the nori over, placing it rice-side down on the rolling mat. Then add your ingredients to the top of the nori.
Putting ingredients toward center | Photo by Meredith
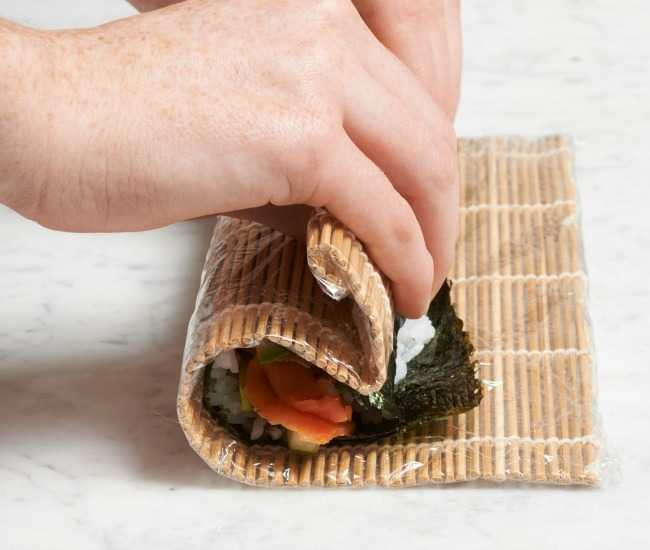
4. Gently lift the bottom of the mat up and over the sushi. Press and shape the ingredients into a tube. Roll with pressure so you get a firm roll.
Rolling sushi in bamboo mat | Photo by Meredith
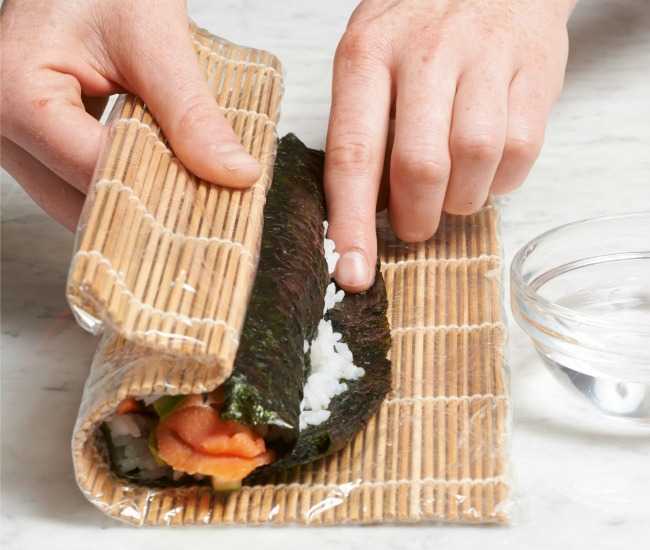
5. Roll until just an inch of nori shows at the top. Seal the edge of the nori with a little cold water. Firm it up by squeezing the mat around the roll until it feels uniformly snug. Be careful not to squeeze so hard that the ingredients are smashed or come oozing out the sides. It’s a fine line; with practice you’ll get the feel of it.
Dampening edge with water | Photo by Meredith
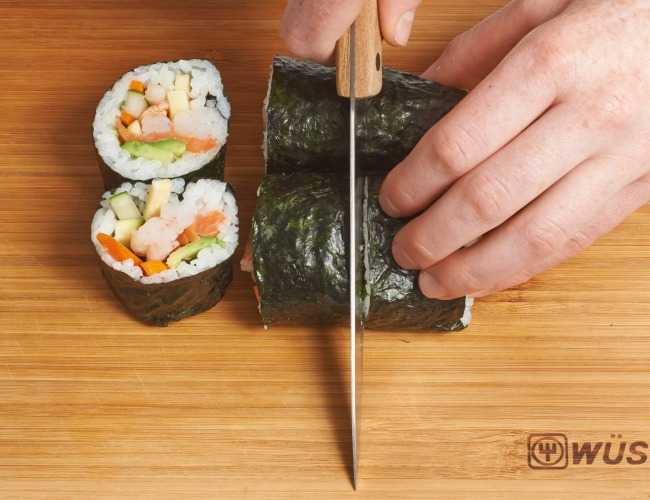
6. Slice the sushi roll in half with a sharp knife on a cutting board. Then cut each half into thirds — so you have 6 pieces of sushi. To get a nice clean cut, wet the knife with water each time you make a slice.
Cutting sushi | Photo by Meredith
7. Line the slices of sushi up on platters or sushi plates. Enjoy with soy sauce, wasabi paste, and pickled ginger, and a little chopped daikon if you like.
Well isn’t that nice you now know how to make sushi,don’t forget that pratice makes perfect and you might not always get it right,unless you do then you’re having a better day than I am right now HHAHAHAHA.
Welcome to my first article in my blog, Its sad to say that I don’t really have anything to say much myself, thats why this blog is more of a journey than a food channel that you see in televisions. Lets start what I’ve been doing this pass few days. I can say at first that I like asian cusine as much as mexican/spanish/american cusine mixed together, because I don’t know if you’ve heard this place called Taco bell, but damn it taste good.The picture is over there at the bottom.
I don’t usually know what to say in articles, but in my opinion is more of saying my opinion in an opinion, ahahahah, see what I did there. Lets get started , asian cusine is a style of cooking and tradition associated with a specific culture. Asia is the largest continent in the world shelters many cultures and cuisines. Some of the major regional cuisines are East Asian, Southeast Asian, South Asian, Central Asian and Middle Eastern cuisines. Besides the difference, all of these varieties of Asian foods share some common features. Ingredients like Rice, Ginger, Garlic, Tofu, Chilies, Dried Onions, Soy and Sesame seeds are used in almost all Asian foods. Cooking practices like Steaming and Stir frying are common in every Asian restaurant. Rice is a staple ingredient in every Asian food; Different varieties are popular in various regions. Basmati is a popular rice variety in subcontinents while long grain rice is popular in China and short grain in Japan and Korea. Curry dishes with its origin in South Asian countries are also common in Southern, Western and Southeastern regions. These are Yogurt based soup with meat or vegetables as optional ingredients. I can say that asian cusine is a part that has many parts and its growing everyday, help it grow in my next article in where we will start making some actual food (east asian food) to be exact.
10 facts of asian cusine
1. It Must be Fresh in China — Canned/Frozen Food Spurned
Wet markets (where live/freshly-butchered animals and freshly picked foods are sold) abound in China — almost one per city block. Many Chinese go every day. Fridge freezers are catching on, but fresh veg is still a must. Tins are despised.
Also, according to Chinese medicine food must be eaten in season to combat too much yin (cold weather) and yang (hot weather), dryness, or dampness. E.g. huge white radishes (with high yang) are very popular in winter.
2. Chinese Eat Bones… Or Spit Bone Splinters
Fish
Chinese don’t like waste, so whole animals are often served. E.g. fish are not filleted, just gutted, with head and bones intact. Sometimes bones are soft enough to chew up; sometimes they must be de-mouthed (onto a side plate).
Chinese believe meat near the bones is the best, and that marrow is very nutritious, so bones are deliberately chopped to splinters to release the marrow — watch out while eating. Bone broth is popular.
3. Everything’s Bite-Size for Chopstick Eating
Chinese don’t eat with knives and forks, traditionally, which is seen as violent or barbaric, but with chopsticks. As chopsticks don’t actually chop, all food is very soft or chopped up into bite-size pieces before cooking.
4. China Uses 45 Billion Pairs of Chopsticks a Year
That’s an unremarkable average of 2 or 3 pairs a month for its approaching 1.4 billion population. The government has imposed a disposable chopstick tax to reduce usage.
Most (disposable) chopsticks are softwood or bamboo, so that’s about 100 square miles or the area of Queens of trees/bamboo… or 50,000 tonnes — imagine trucks of chopsticks lined up end-to-end for 30 miles.
5. The Same Thing Can Be Cooked a Dozen Ways
Like Bubba’s shrimp in Forest Gump, there are many ways to cook Chinese food. For example, a fish could be steamed, boiled, stewed, quick-fried, stir-fried, deep-fried, roasted, sautéed, marinated in brine, pickled in vinegar, soy-sauced, or sweet-and-sour-sauced.
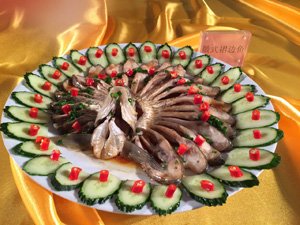
6. Food Decoration Can Verge on the Ridiculous
A fish dish is decorated with cucumber slices and red peppers.
Chinese chefs, particularly Jiangsu cuisine experts, go overboard on presentation. They believe “the first bite is with the eyes”. Dishes are served in precise patterns or lifelike shapes, brightened by intricate vegetable carvings and decorative herbs.
7. Dish Names Can Be Misleading
Chinese like to give to dishes catchy names. Some names have nothing to do with their ingredients. For example:
Husband Wife lungs- doesn’t actually mean cannibablism, but a another term for a weird cut that is a seasoned with chilli oil.
Remember, a ‘field chicken’ (田鸡 tiánjī) is a frog! A tour guide or translator will help you avoid surprises. We offer our services below.
13. Food Is Superstitiously Symbolic
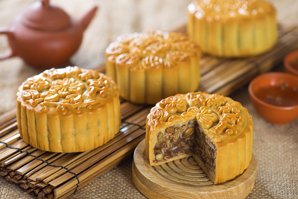
Mooncakes
Chinese attach particular meanings to certain foods based on shapes, colors, pronunciations, and legends. Superstition and tradition dictate certain foods must be eaten for certain festivals/events to invoke a blessing.
For example, ingot-shaped dumplings mean wealth at New Year, and round mooncakes represent family reunion at Mid-Autumn. See The Symbolism of Chinese Foods.
14. Dishes Are Shared Lazy-Suzy-Style
In traditional Chinese meals, dishes are shared communally. Dishes are served in the middle of a table, and people sit with their rice bowls around it.
In restaurants, especially for tables seating 10 or 12, there are usually lazy Susan turntables to permit easy sharing among diners. See What Restaurants Are Like in China.
15. The Guest Is Seated at the Table’s “Head”
The honored guest is customarily seated furthest from the door with the fish, chicken, duck… heads pointing his way.
What is the best thing to kill? No, not time, how about dumplings? Using a sharpend knife you could really show your inner psychotic personality with food.


